# Creating a scene
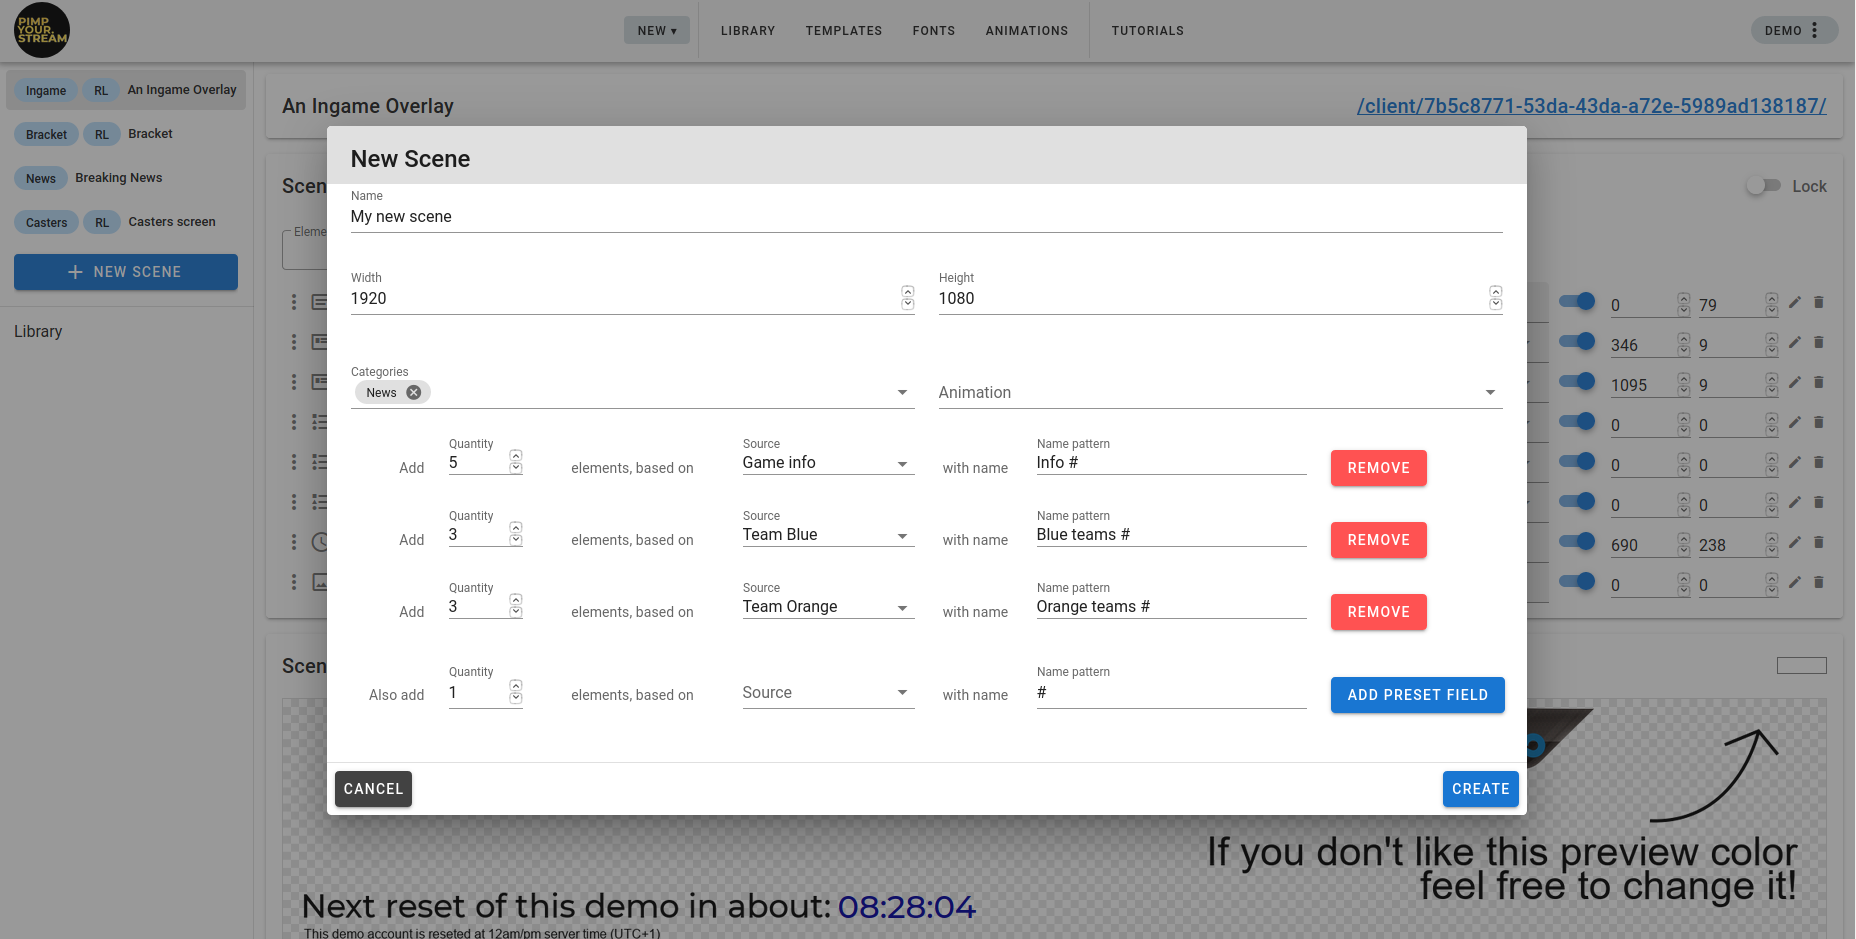
Creating a scene is pretty straightforward. Click on New scene, give it a name, select the dimensions of the HTML window (1920x1080 by default), assign one or several categories to it. This can be edited afterwards, at the bottom of the scene page.
Optionally, you can create and insert into the scene some elements based on existing elements. Select the quantity of elements and the model in the source dropdown menu. You can also give that list a name pattern with some numbers.
# Example:
If you create 5 elements based on the X text element source with the name Info #, then the X element will be duplicated 5 times into 5 elements called Info 1, Info 2, Info 3, Info 4 and Info 5. Read that sentence again slowly, it will make sense, we promise. Then click Add preset field to confirm the above field, and add more if needed.
# Adding elements
# Adding elements
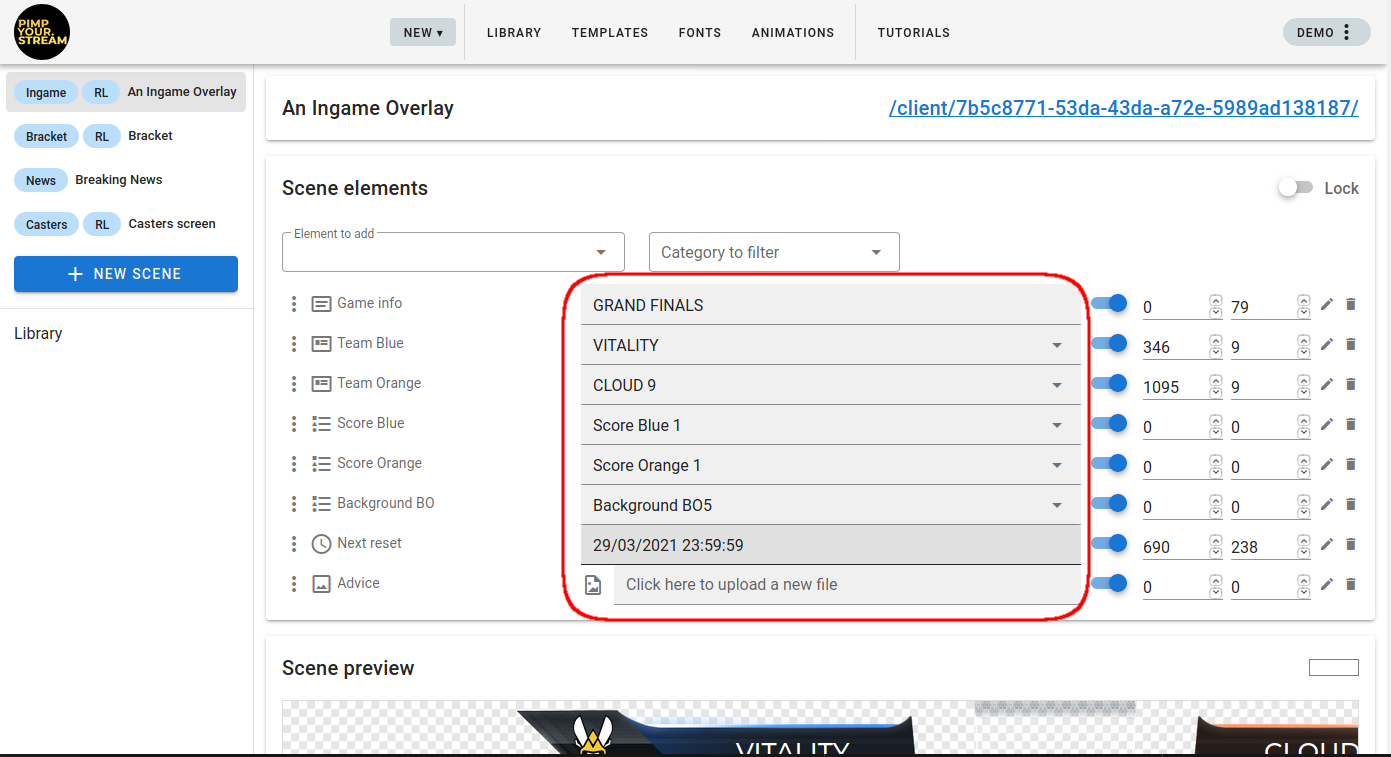
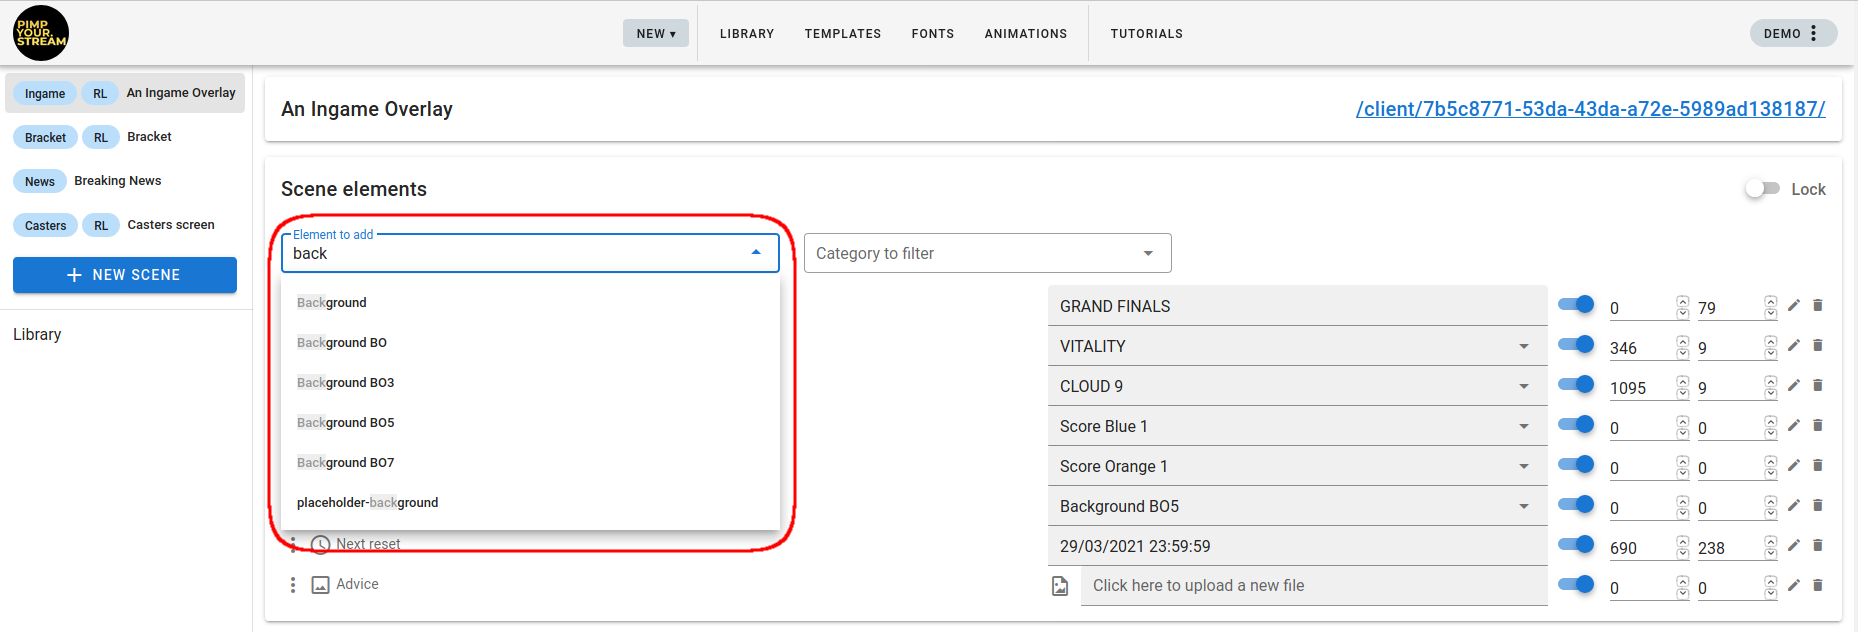
Once your scene is created, you can fill it with elements. Just click on the Element to add dropdown menu. Use the text field to filter the elements by name.
# Displaying elements
The element is now into the scene, but not visible yet. It first needs to be displayed by toggling the blue button to the right.

# Placing elements
Now that you’ve displayed it, maybe that your element placement needs some adjusting. Use the coordinates editor to the right of the blue button. Enter x & y values to have the element at the right place in the scene. Note that the coordinates define the top left corner of the element and are expressed in pixels.

When you’ve got several elements in the scene, you can click and drag them towards the top or the bottom of the elements list: basically, each element is a layer that will hide the elements below, and will be hidden by the elements above. Quite user-friendly, don’t you think?
# Editing elements
You can edit the content of the element from the scene page directly. If it’s a text element, you can seed the text and can edit it on the go. If it’s a picture or video, you can upload a different one. If it’s a picker, you can select one of the available elements. If it’s a Template Placer, you can select the Template Instance you want to display.

# Removing elements
There’s a bin. Can’t you see it? No, it doesn’t delete the element, it only removes it from the scene.

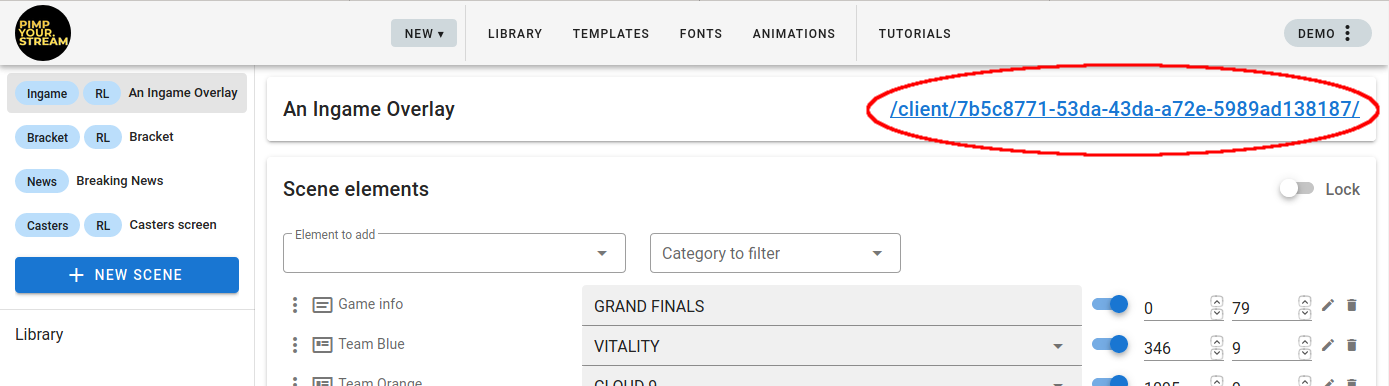
# Going live
Integrating a PimpYour.Stream scene into your broadcasting software is super easy. There’s a link on the top right corner of the scene page. If you open it, you’ll see the current display of the scene: it’s called the Client View. Each modification you make to the elements of the scene is instantly updated in the Client View.
Paste the Client View URL in your broadcasting software as a browser source with the same dimensions as your scene (1920x1080 pixels by default). And voilà. It’s live and it’s updated real-time as you do it on your PYS scene page.
# Updating scenes
Change the text fields, select different Template Instances, pick the right pictures… Feel the power.